
EFFECTCRAFT · WINDOWS DESKTOP
EffectCraft Desktop Tutorial: Make a Two-Second Block Animation
Follow actual Windows v0.9.2 screenshots to open a native animation, edit a position key, save and reopen a copy, then export a two-second GIF through the desktop render queue.
Prepare the App, Native Project and Expected Result
Tested October 13, 2026 with the Windows 11 x64 portable EffectCraft v0.9.2 app. The captured menus are in Simplified Chinese, with some English panels and buttons. No Rust installation or CLI commands are required. Mac/Linux and MSI installation are outside this test.
- Use the official download guide to choose a portable ZIP matching your computer, and verify it against the same release’s SHA256 list.
- Right-click the ZIP → Extract All, open the folder containing effectcraft.exe and launch it. Do not run it inside the archive.
- Download first-motion.ecproj and remember its folder. This original project has two solid layers and requires no fonts or external media.
Download starting project Download completed project · Download desktop-rendered GIF
Goal: change X at 1.5 seconds from 560 to 500, keeping Y=180. Save a separate project, reopen it, then export a two-second GIF at 640 × 360, 24 fps, 48 frames. Click screenshots for full-size views.
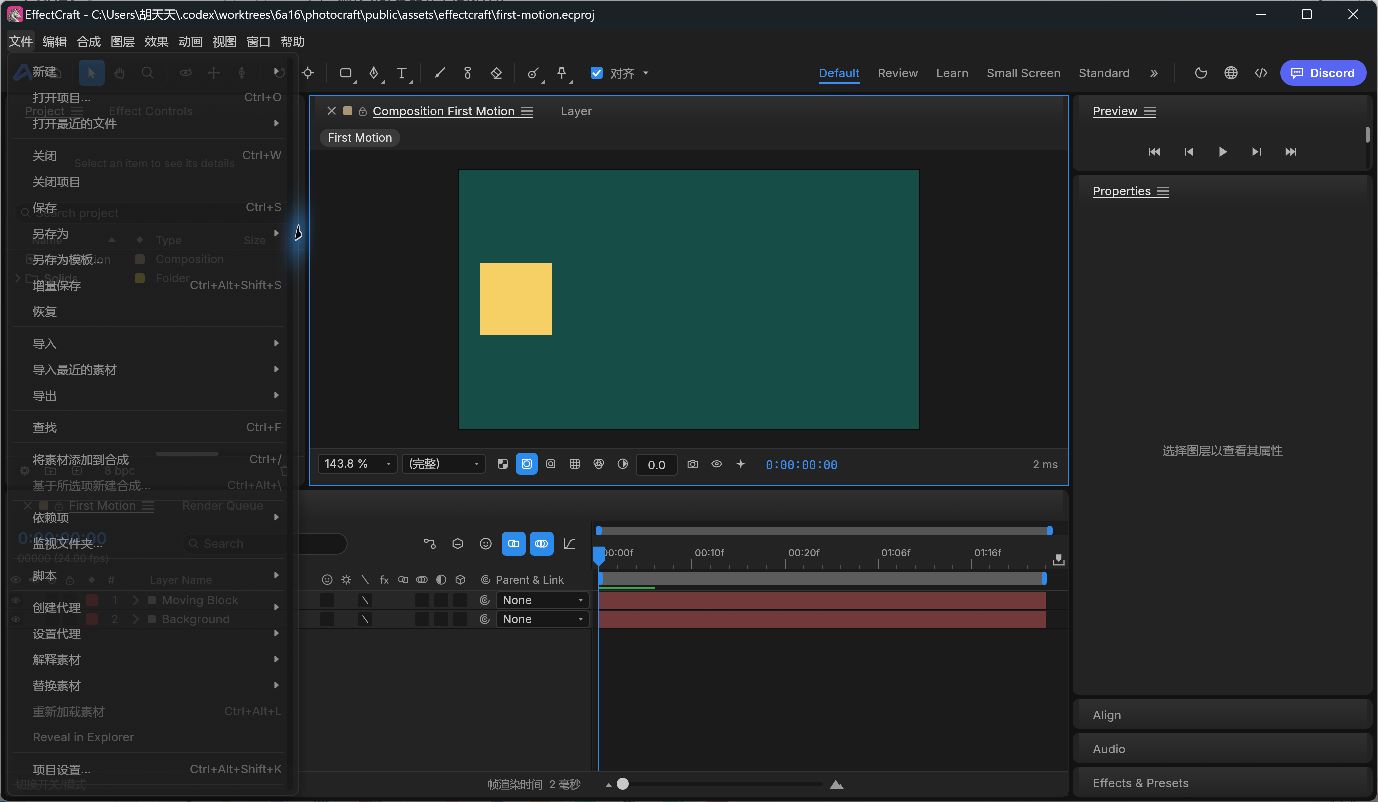
1. Open the Sample with File → Open Project
- Choose File → Open Project... (文件 → 打开项目...), or press Ctrl+O on Windows.
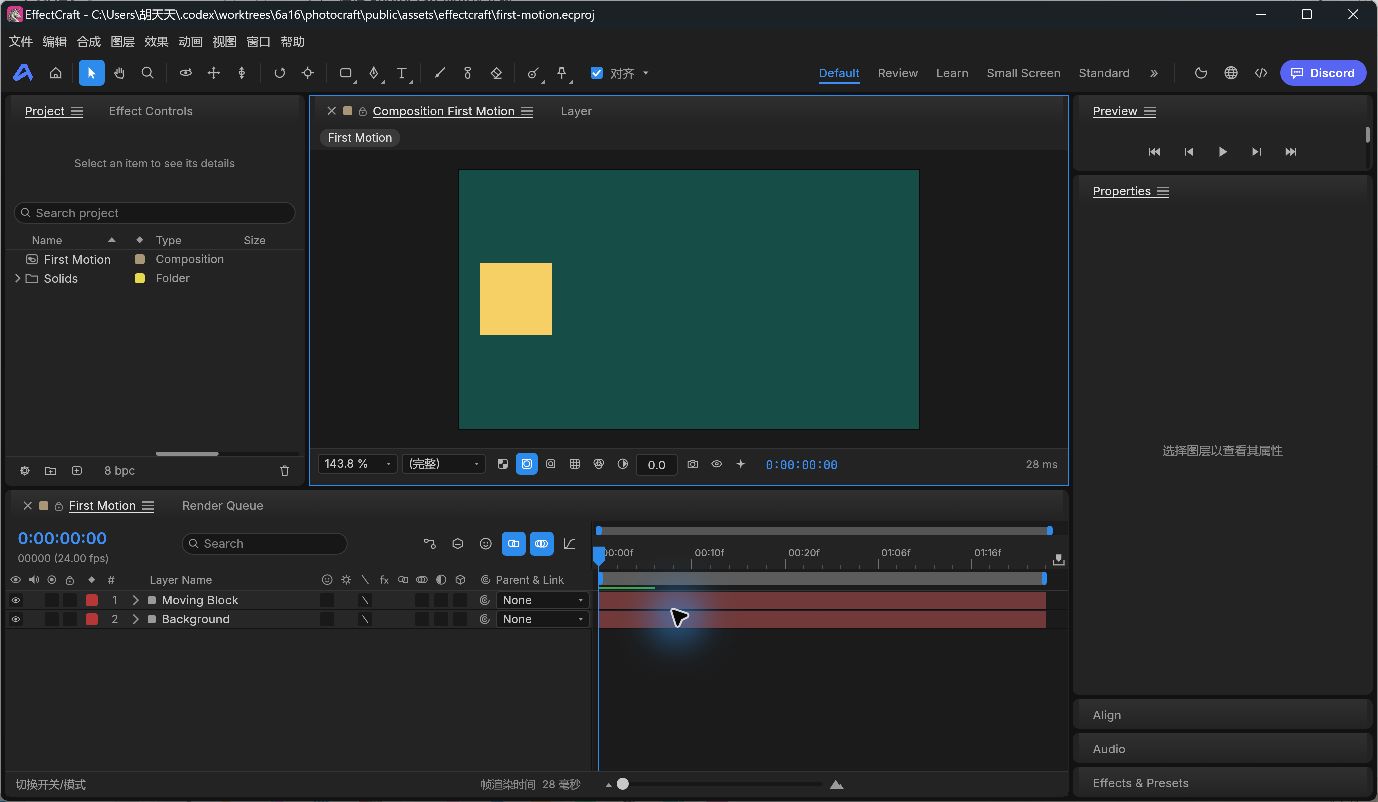
- Select first-motion.ecproj in the file dialog and click Open. Open it as a project, not imported footage.
- Expect a green background and yellow block on the left, First Motion in Project, and Moving Block plus Background in the timeline. Double-click First Motion in Project if the composition is not in the viewer.
2. Select the Layer and Reveal Position Keys
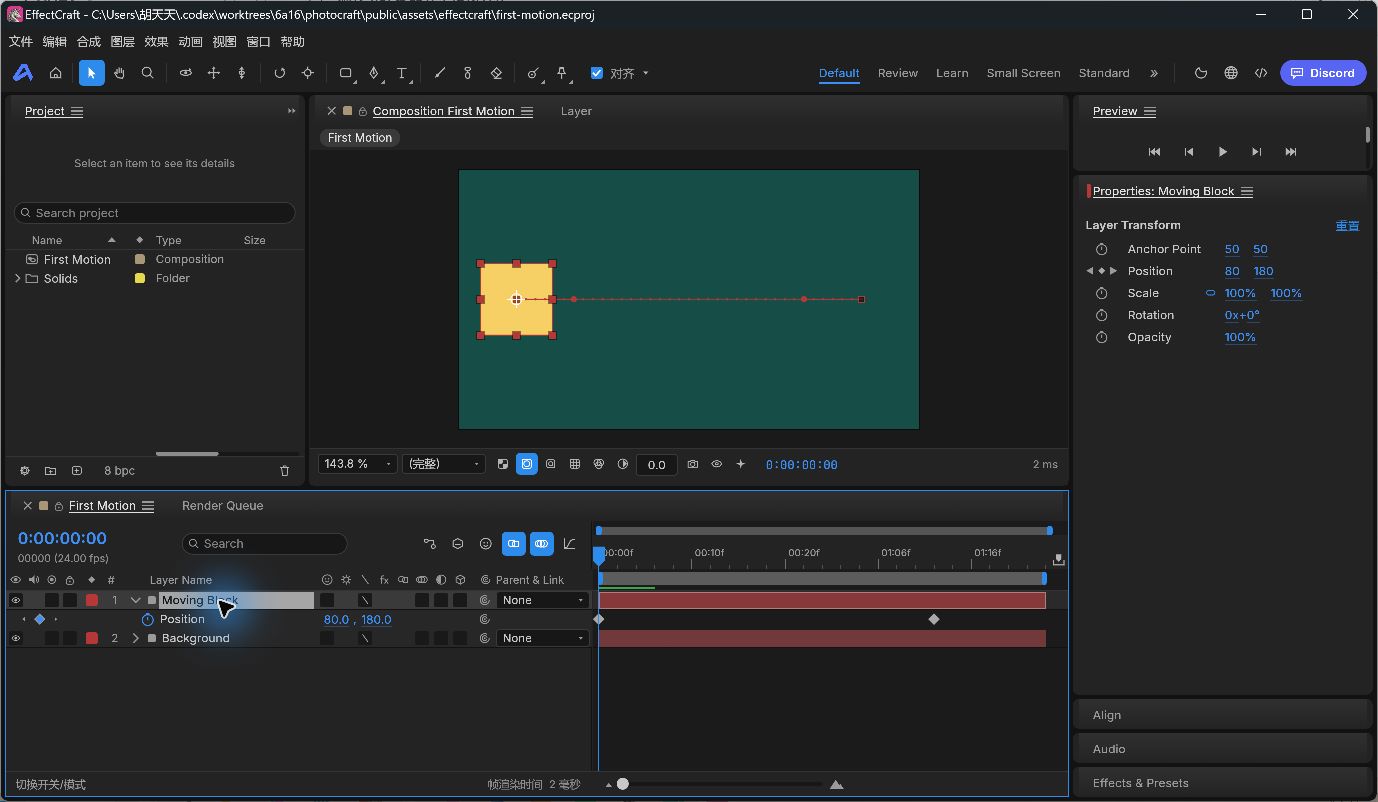
- Click Moving Block’s layer name in the lower timeline, not Background.
- Press P to reveal Position. The blue stopwatch and two diamonds indicate an animated position.
- At time zero, confirm 80, 180. Click the timeline ruler above the endpoint diamond to set the playhead to 0:00:01:12: frame 36 at 24 fps, or 1.5 seconds.
Check the time display before editing. Editing at another time may change a different key or add a new one. The original endpoint is 560, 180.
3. Change the Endpoint X to 500
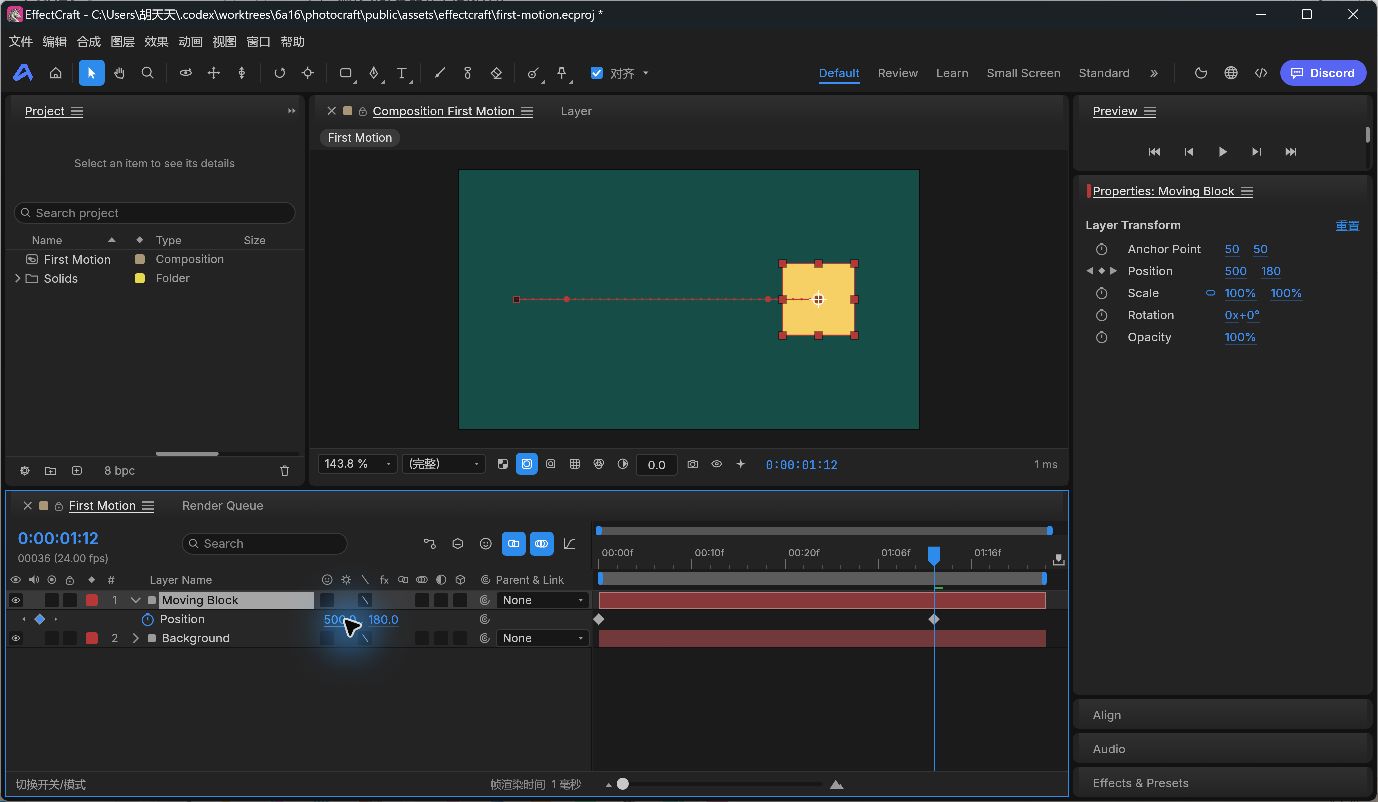
- At 0:00:01:12, double-click the first blue Position value, 560.0, in the timeline.
- Enter 500 and press Enter. Leave Y at 180.
- Confirm 500.0, 180.0 and that the block moved left from its original endpoint. An asterisk in the title means the edit is unsaved.
4. Save a New Project and Reopen It
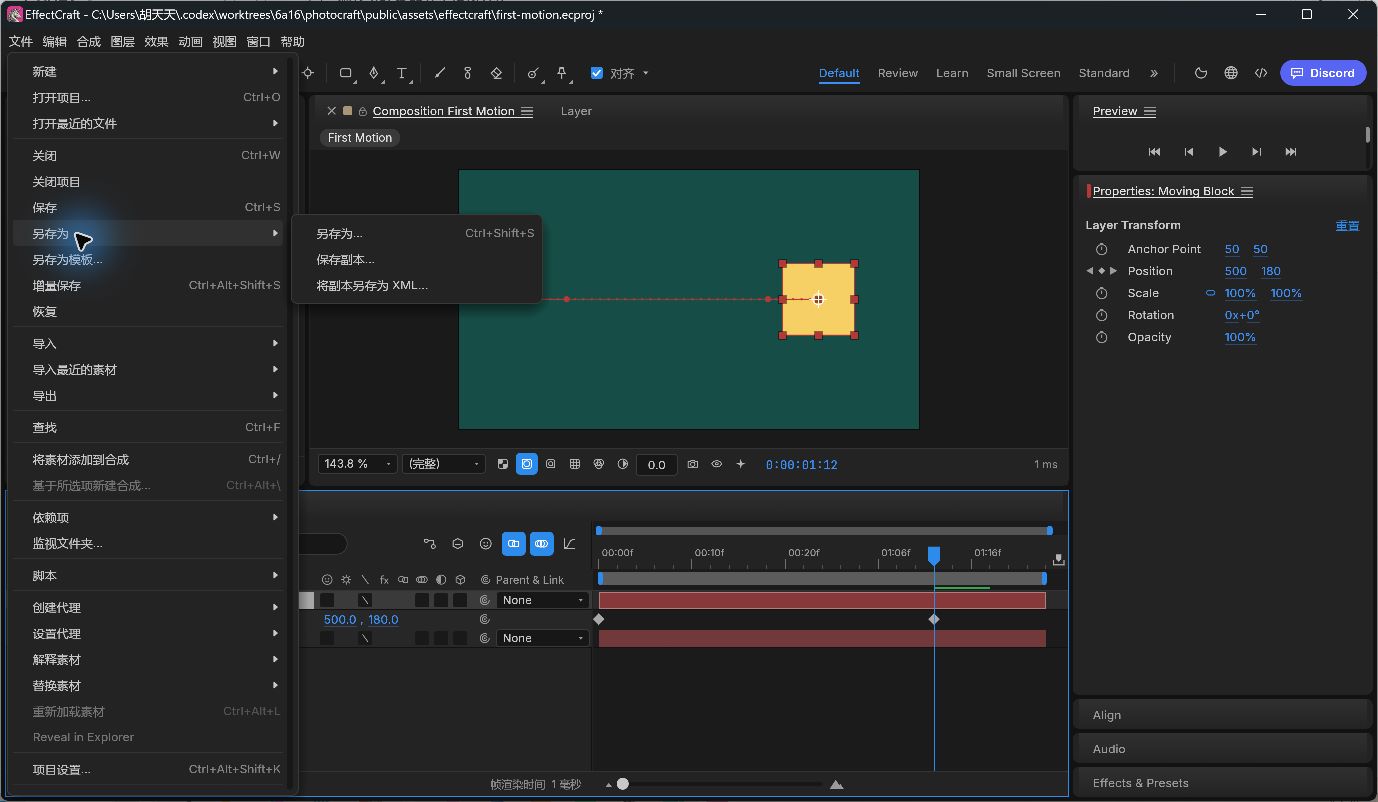
- Choose File → Save As → Save As... (文件 → 另存为 → 另存为...), or press Ctrl+Shift+S.
- Enter desktop-motion.ecproj in a writable folder and click Save. Keep first-motion.ecproj intact. The title should show the new name without the asterisk.
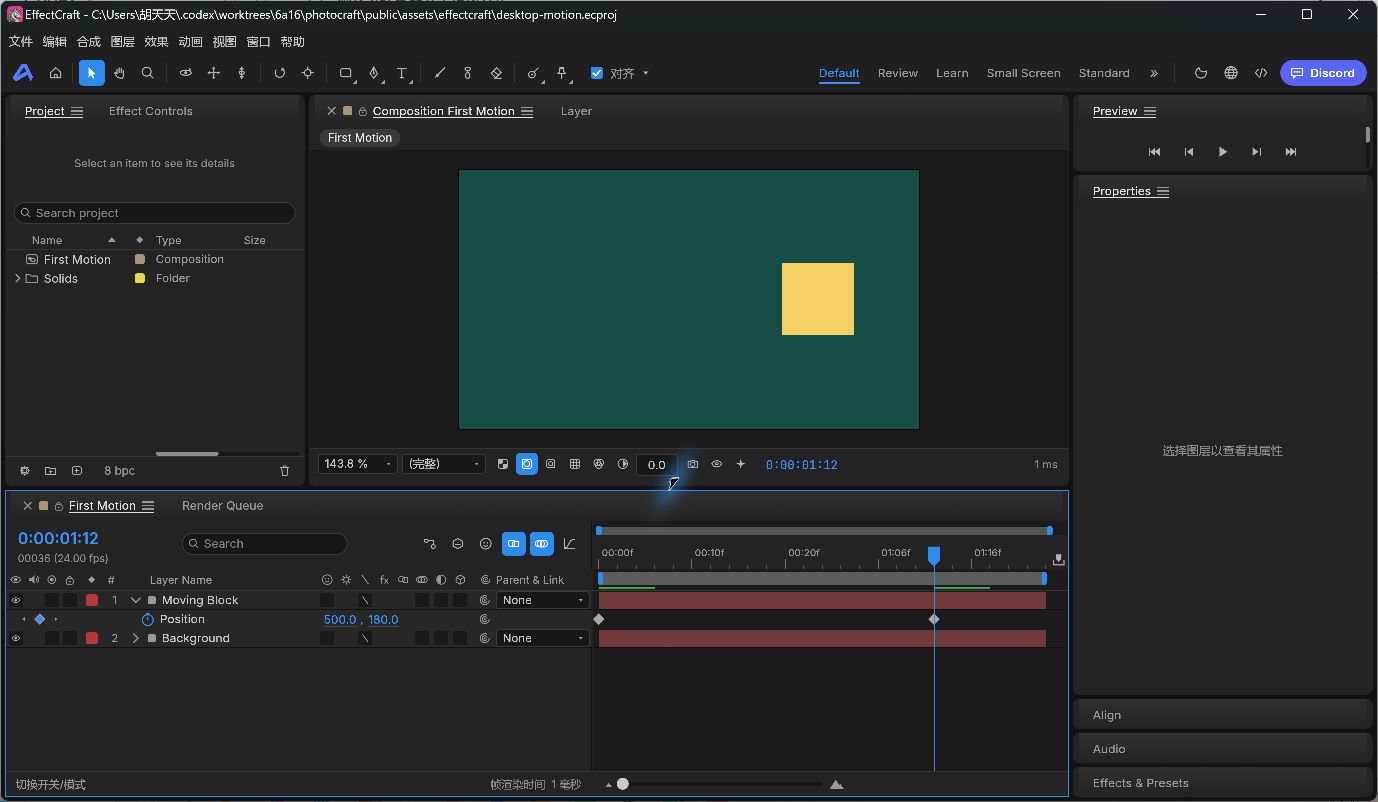
- Use File → Open Project... again to open the saved desktop-motion.ecproj.
- Reopening returns the playhead to zero. Go to 0:00:01:12 and confirm Position is still 500, 180, with the same edited endpoint.
5. Export a GIF from the Desktop Render Queue
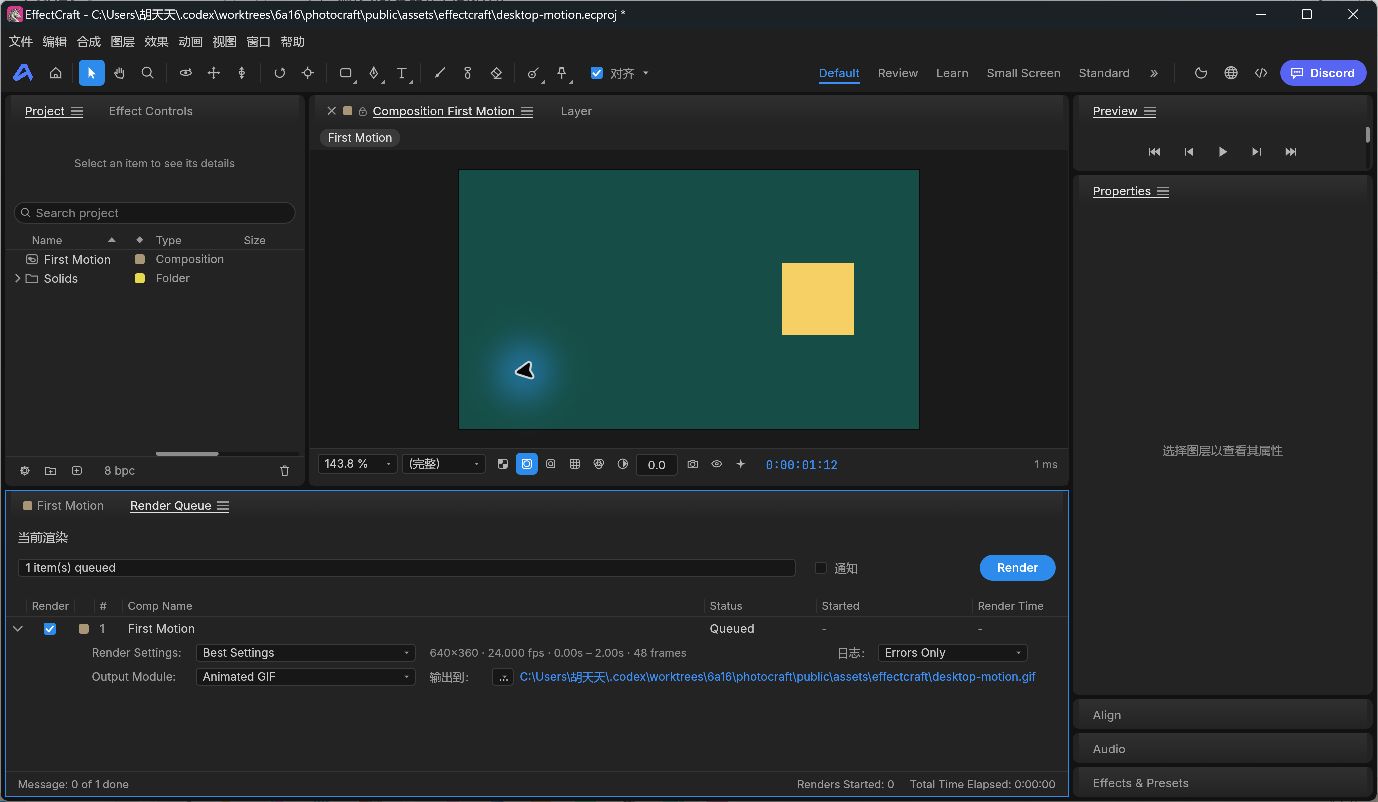
- With First Motion active, choose Composition → Add to Render Queue (合成 → 添加到渲染队列), or press Ctrl+M.
- The lower panel switches to Render Queue. Click the small arrow at the far left of First Motion to reveal Render Settings, Output Module and Output To (输出到).
- Keep Best Settings. Confirm 640×360, 24.000 fps, 0.00s–2.00s and 48 frames beside it.
- Open the Output Module dropdown and choose Animated GIF.
- Click the ellipsis beside Output To → Choose File..., choose a writable folder, enter desktop-motion.gif and click Save. Confirm the blue output path ends in .gif.
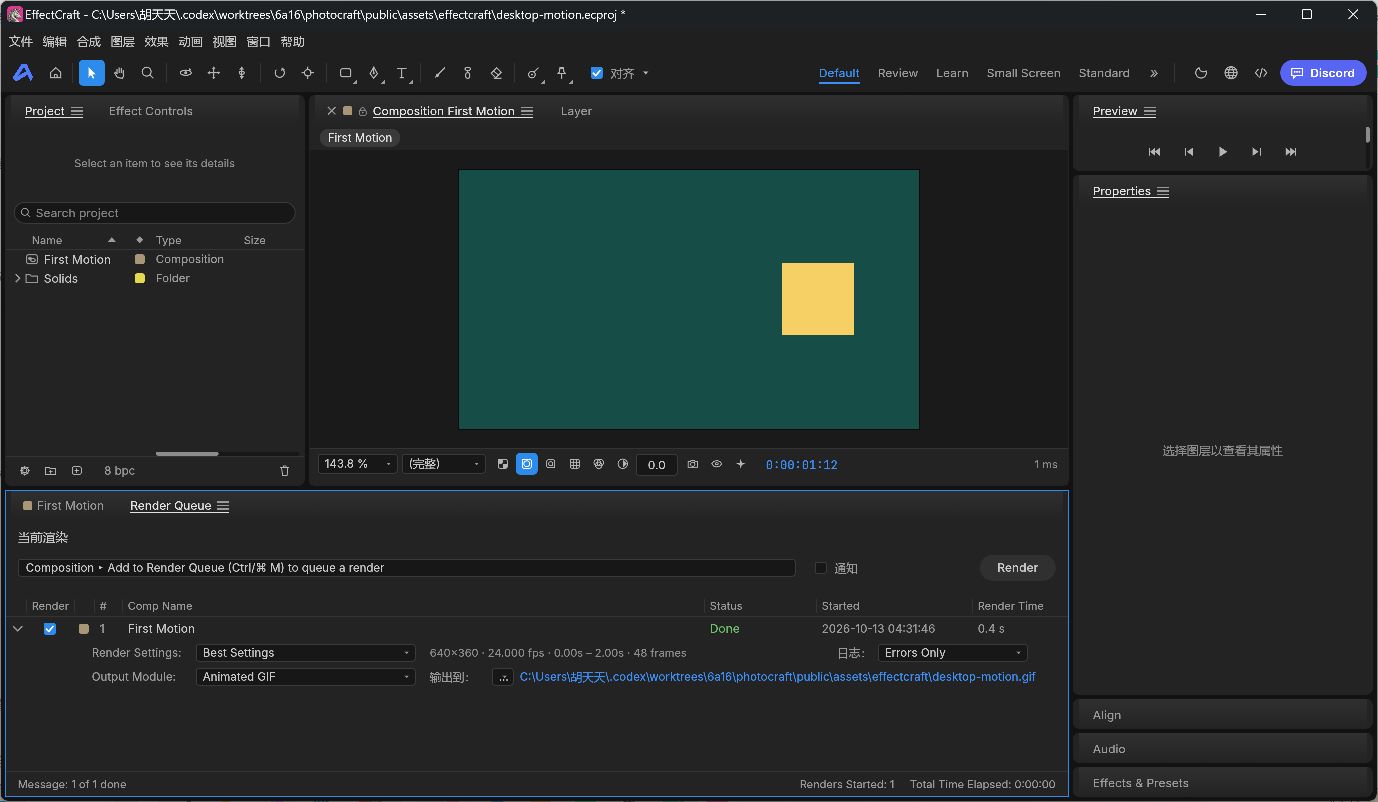
- Click Render. Wait for Status=Done and Message: 1 of 1 done; an active render or selected filename alone is not completion.
- Open desktop-motion.gif in the output folder. Check motion from left to right and an endpoint around x=500. Keep .ecproj for further editing; the exported GIF is not a native project.
View the actual desktop-rendered GIF

Troubleshooting
Why is Position or the keyframe row missing?
Select Moving Block in the timeline and press P. Open the native .ecproj as a project, not footage. Do not repeatedly toggle the blue stopwatch on an already animated property.
Why is the endpoint not 500?
Check 0:00:01:12, the X field, Enter to commit and the saved filename. Reopen and inspect the same time; the missing asterisk alone does not prove the edit persisted.
Why is Render unavailable or the GIF missing?
Check that First Motion is queued and enabled, Animated GIF is selected and the output folder is writable. Follow the blue output path and wait for Done. Preserve any error instead of treating a failed export as success.
What about startup errors or low memory?
Record system architecture, version and the complete error. Our machine displayed a low-memory message and reduced caches, but this two-layer exercise completed. That does not establish large-project reliability. Keep the original and saved copies, consult Issues and do not bypass system security warnings.
Test Scope and Next Exercise
Actual Windows x64 v0.9.2 portable desktop actions: open, P to reveal Position, edit, Save As, reopen and render GIF. Separate file checks confirm savedBy=0.9.2, two keys, the edited endpoint, and a 640 × 360, 48-frame GIF. No same-machine AE benchmark, MSI, other OS, new Web, fonts, audio, 3D or professional-project validation was performed.
Next, change Y or duration one parameter at a time and save separate copies. For scripting, use the CLI tutorial. Before migrating existing work, read the AE workflow and migration comparison.
EffectCraft v0.9.2 README · Known gaps · Matching official release